Ever wondered how to remove the interior trim of a 150 Series Prado? Wanted to install a UHF radio in one? Just interested in what I’m writing about today? Then read on…
So this year my wife and I started a new tradition – maybe – for Christmas. She calmly remarked “I’ve bought myself a Christmas Present and put it under the tree, so feel free to get one for yourself”. Now at this point it’s important to point out that she is awesome, and got me a 4WD off-road training day, so she rocks.
So my mind was at work and I realised that the new (2nd hand) Prado was in need of one piece of kit – a UHF radio.Naturally I ran to ARB to get myself a GME radio.
Selecting the radio was interesting, as GME have a new range of XRS radios, and the salesman kindly pointed out that I should go for the compact one, as the bigger unit was being phased out. Fair call. So I started digging into what was so good about the XRS over the old TX range, and it came down to the ability to control the radio through an app on your mobile phone.
I calmly asked “So, this new unit does everything the old one does, but allows for some cute features through an app”. “Yep” was the gleeful response. “So the old one will pretty much do all the stuff you need it to out on the road really”. “Yep” again. “So I don’t think I’d be likely to use the app very often” I remarked, “Would you?”. “Nope” was the response this time. “So I’m really better off saving a couple of hundred and getting the old one in the kit with the antenna and everything”. “I guess so, yep”.
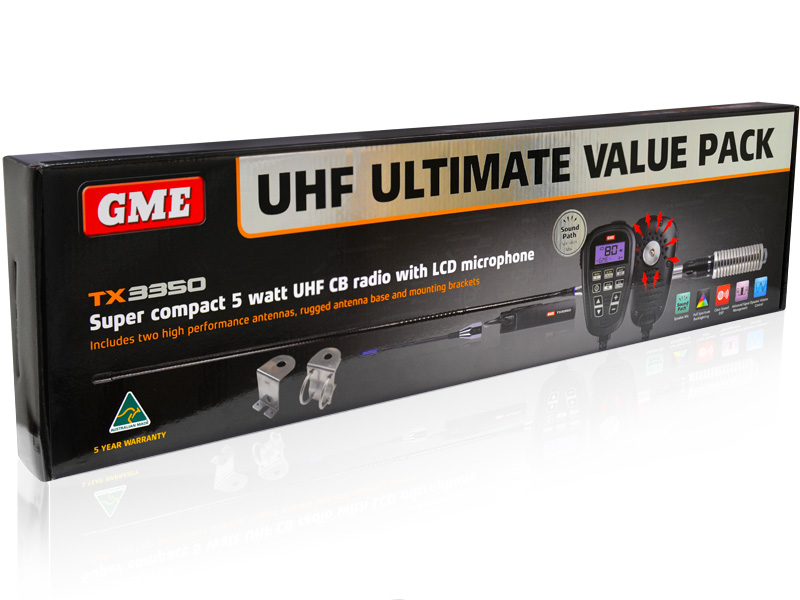
So, I walked out with the TX3350 Ultimate pack. The XRS could be a christmas present a few years from now, but this should do the trick nicely in the meantime.
But how do I install it?
So the Prado is not a new car, but it’s been well looked after so I didn’t want to hurt it, so understanding where the trim clips were and the sequence to open her up was important to me. But:
- Haynes don’t do a workshop manual for it, so I was stuck there, and
- Nowhere on the web had anything I’d consider to be a confidence building explanation of how to go about installing such a thing myself.
That said, I got a few tips from people, both about the Prado and more generally installing radios to get the job done. But not happy with that, I’ve put this description together to help anyone else out there who needs to know how to go about doing this.
Follow these instructions at your own risk!!!!
There are steps that could damage your trim, and some that could even damage the wiring loom and cause an ECU failure.
It worked for me on my 2012 Prado Altitude, but some panels and clips may be different on your 150 Prado… so take care, never use force – stop and think about what’s happened. Nothing in the instructions below required any form of force.
Step 1: Planning Ahead
OK, so there are a few things you’re going to need to think about before starting out. These are:
- Do I have enough time and light?
This is going to take you a few hours… I took 3 all up. Take your time, make sure you aren’t going to be rushed off to the shops, or late for a lunch date. This isn’t a job to rush. - Where to you plan to mount the main unit of the radio and the handset?I didn’t want any holes in my trim, so I opted for double sided tape (DST) to mount the unit at the bottom of the center console on the driver’s side. It’s worth noting here that my first attempt using 3M VHB (very high bonding) DST failed. While it was fine for the hand piece, the VHB did not adhere to the patterned vinyl of the console. Luckily I had some “inferior” Repco DST, which worked beautifully.I’ve also seen people hide it away under the aircon unit, but I opted away from this, so that I can use the unit’s speaker if I choose to.
- Are you going to connect it to permanent power or switch it with your ignition?This was a no-brainer for me. I wanted to be able to use it with the vehicle off, and luckily I have a dual battery system, so I’ve hooked it up to the secondary battery directly. This unit DOES NOT have an auto-shutoff feature, so obviously I’ll need to be conscientious about turning it off.
Step 2: Get your tools together
You’re going to need a few, not all of them are mandatory, here they are in a few categories:
Mandatory tools & materials you need
- Soldering Iron and solder
- Electrical tape
- Crimping Pliers
- Crimp battery terminals (ideally one red, one black)
- Side Cutters
- 10mm Socket Wrench
- A coat hanger
- Scissors
- Double Sided Tape
- A length of sheathed, twin core power cable (long enough to run from your battery to your cabin through the firewall)
- Some 7mm corrugated split-tube (5 m should suffice)
- Black zip ties (quite long ones – I used 2 300mm ties together at times)
- A wrench or socket suitable for your battery terminals
Tools and materials I had and their alternatives
- Coaxial Cable Stripper (a sharp knife used carefully will suffice)
- Cable Stripper (again, with the knife)
- Heat Shrink tubing (electrical tape would do)
- A heat gun (or a hair dryer, but only if you’re using heat shrink)
- A soldering vice (otherwise some steady hands soldering on a thick surface).
Tools I wish I’d had
- A set of trim levers
Step 3: Remove the required trim
There are a heap of bits of trim you just don’t want in the way here, so let’s get rid of them now.
Radiator Cowl
You will need to remove the radiator cowling, which is pretty easy. There are 12 push-rivets (yellow circle below) to remove – use your fingernails or a small screwdriver to lift the centre of the rivet then pull the rest clear. Be careful as they may have become brittle with age.
Bonnet Lip Cowl
I ran all my cables under the bonnet lip, so removing this cowl gave me easy access. This one is secured by 3 white plastic push rivets. The one closest to the windscreen needs to be carefully pulled out, and then the cowl will slide forward and release.


When replacing this one, slide it onto the two forward-most rivets, then put the third rivet back into the cowl and push it into the chassis.
Cabin Interior Trim
Now the daunting task of removing interior panels – I’ve broken enough clips to know which can be devastating, but the Prado is remarkably well designed for this. We’re only going to be playing in the driver foot well.
- Remove the door sill. Start at the end closest to the front of the vehicle, and get a finger under the inside edge of it and carefully lift this up. A few pops later and it should lift out of the way.


- Remove the outer well panel. There is a little thumb screw here to open it up, then one clip holding it in place. Just pull it gentle toward the back of the car and it will come free.


- Remove the door side panel. This holds the main console pieces in place so needs to come out next. Get a trim tool *or a small screw driver if you must) and gently pry it back. It will pop and you can pull it back to remove it from under the door seal.


- Remove the lower foot well shield. This has a screw to remove (or probably does – mine did not). For me this just pulled away. It won’t completely release though because of some attached wiring loom.


- Remove the bottom dash panel. Remove the two 10mm bolts at the lower left and right corners. Then pull it out from the top and carefully remove if from the knee airbag box (not something you want to disturb…)


- Remove the inner side panel. This is the first part to pull off to get access to the center console area. Once it’s off, remove the 10mm bolt to get easy access to feed cables through. Removing the front kick panel also helps here. This is just a pull and lift job.


That’s got all out trim out of the way. Let the games begin!
Step 4: Install the antenna
So I’ve been told that mounting the antenna on the roof gets you a bit of additional gain and range on long trips, but I was worried about the extra roof clearance required for the antenna stub. I tried to get one of the GME folding brackets, but no one had them, and everyone looked puzzled at what I was planning. So I gave up and did what everyone seems to do – mounting it to the bull bar. I expect that I will mount a second point to the roof rack at some point in the future.
- Thread the coax cable through the spring mount, and then thread this through the bull bar, and then through the mounting nut. Tighten this onto the bull-bar securely.
- Identify where you are going to run your cable and roughly measure out the length of this path back to a firewall grommet. Cut this length of corrugated tubing and slide this down the coax cable
- Thread the coax though the grill and into the engine compartment. Then secure the cable with zip ties to minimise them rubbing against the grille


- Then thread the wire through the path you previously identified. I kept mine high in the engine bay, threading it through some channels in the right-hand quarter panel lip where wiring looms were already in place.
- Here’s the tricky part – you’re going to want to get the wire through the firewall. This is what the coat hanger is for.1) Cut the hook off the coat hanger and bend it into a single, straight piece of wire
2) push this through the large grommet, carefully ensuring you don’t pierce any existing wiring loom.
3) Once you’ve got it through, tape the end of the coaxial cable tightly to the coat hanger using electrical tape.
4) Have a friend feed the cable through while you carefully pull the coat hanger into the cabin
5) untape the cable from the coat hanger and pull the remaining free cable through to the cabin.
Step 5: Run a power line
For this one I had an existing power line running through the smaller, upper grommet. Note that this grommet it hidden behind the firewall carpet on the interior if you choose to use it.
Take the twin core cable and pull it through your chosen grommet just like you did for the antenna coax. A helping hand is always great here.
Once you pull through enough power cable to be comfortable in the cabin, return to the bonnet and measure off enough cable to reach your desired power source. Like I said, mine was the secondary battery. Cut the cable, and then feed it through some more corrugated split-tube for protection. While it’s like this, feed it through any looms or clips that you want to use to secure the Cable. Alternatively use zip ties again to hold it in place securely.
Step 6: Connect the radio unit’s power cable to the new power line
Once it’s through, you can connect the power to the plug provided with the unit. Remember to keep the fuse inline to protect the radio. Slide some heat shrink tube down one of the wires, twist them together (remember, red to red, black to black 🙂 ), and then solder them together before pulling the heat shrink over them and sealing the join. I also use electrical tape to bind the whole thing up when I’m finished.
A tip when joining electrical cable – sorry I didn’t take photos so drawings will need to do. Don’t ever cut your positive and negative leads to the same length – when you do this there is possibility they could come into contact (not that they’re live here, but it’s a good habit).
Once this it done you’re ready to connect it up to the battery. Pull the end of the cable out of the tube and strip it back to expose enough of the individual cores to reach their desired terminals. Use the crimp pliers to connect a battery terminal to each. Then hook it up to the battery terminals.
Notice that I have pulled out the red wire from the tube and taped it closed. just a little extra security here.
Step 7: Power up!
First up, check that the car starts up and no warning lights are present. Once you’re sure that looks ok, connect the antenna and then the power plug to the radio unit. Now power up your radio and do a radio check. If you’ve followed these instructions you should be up and running…
Step 8: Enjoy a success beer…
Hopefully everything’s worked out for you. One thing worth thinking about is that you could maybe dab some silicon onto the grommets just to make sure they’re water resistant.
Otherwise, enjoy chatting with your next convoy!
Cheers…

Thanks. VERY much appreciated. Just need to find a good mounting point for the radio, or buy a new mic head unit like yours. Seems to be what many Prado owners are stuck with due to lack of mounting places for the “standard” unit.
LikeLike
Yeah, the trend in new radio units is a compact main unit with the display and interface in the hand piece. Allows for more stow spaces for many ( 1 DIN pocket plates replacing radios etc in the console).
Are you in a Prado? What radio unit are you using?
LikeLike